
It’s happened to all of us. You’re online and hunting for some needed information when a popup takes your screen hostage. No matter how you feel about popups, you can’t argue with one solid fact. They work. Popups have higher click through rate than other forms of advertising and have been shown to boost subscription rates as high as 86%.[1]
Regardless of whether you want to promote an offer, advertise, boost subscription rates, or just keep viewers on your page, popups can be a great tool to implement on your site. If this sounds like an option that you want on your site then let’s go over a basic “How To” of how to get popups on your page.
1. Procure a Praiseworthy Popup Plugin (Alliteration Always Advances Articles…Effectively)

For this “How To” we will be using Popup Maker. It’s free to download and use but has some great extended uses you can purchase for whatever your custom needs might be (i.e. scheduling popups to certain dates and times, popups that will only trigger under specific conditions, login popups for added security, etc). If any of this peaks your interest you should definitely give them a more indepth look..
Go into the WordPress administration screen, go to Plugins > Add New, and search for Popup Maker. Once you’ve located the Popup Maker plugin, click install and activate the plugin.
2. Get the Basics!
Once the plugin is installed you should be able to find a new menu selection under the WordPress administration screen labeled Popup Maker. This is the Popup Editor and it is going to be the bread and butter of making your website’s popups. Under the Popup Maker tab, select Add Popup to start making your popup.
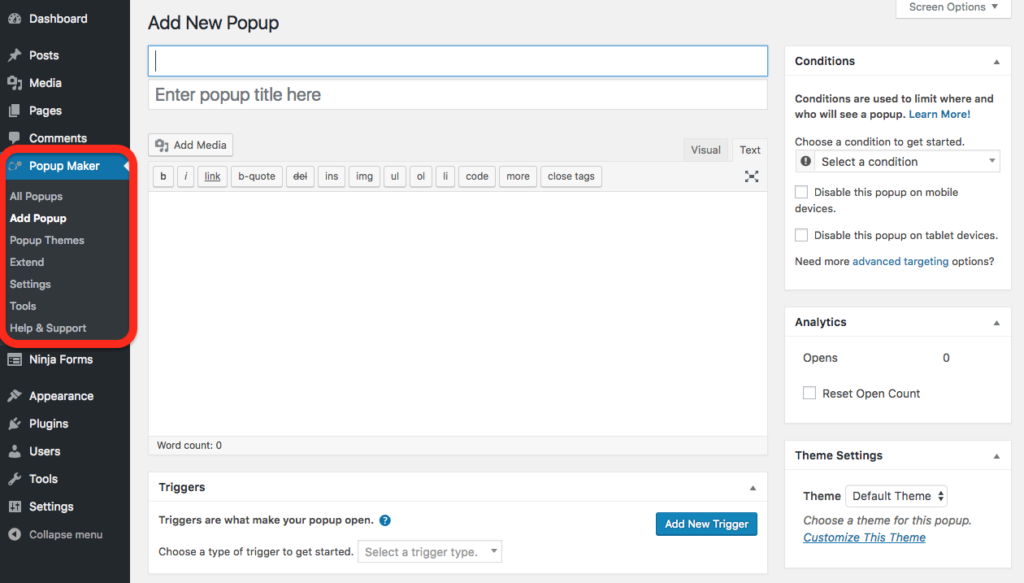
The first three fields you are going to need to fill out are Name, Title, and Content. Name will help identify your popup and distinguish it from a list once you create more, Title will be displayed above the content of your popup for your viewer, and Content will hold…well…your content. Your content can be given in shortcodes or even multimedia thanks to a built in WordPress WYSIWYG Editor. Once you’ve filled out these three boxes, you’re ready for your next task.
3. Conditioners, Now Not Only for Shower Time
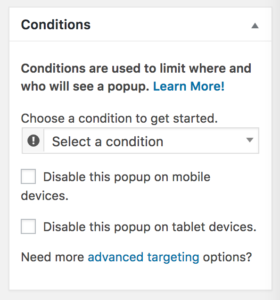 The last thing you will want to do before you publish your popup is to set the conditions on which it will show itself to the viewer. Popups have two basic settings, Always On and Conditional. Always On will have your popup show itself on every page. Conditional gives you the opportunity to set qualifiers on your content, so your popup only arises after certain criteria have been met. Play around with these options until you find what works best for you.
4. Publish that Ponderous Popup Posthaste!
Once you feel satisfied with your work hit publish and watch your new popup go. Congratulations! You’ve just taken the first steps in getting popups on your site. Once you’re comfortable with the above steps, be sure to check out how to change your Themes, Triggers, Analytics, and other settings.
What processes have you found that really help in making a Popup? Please be sure to share with us in the comments and to also share any tips or tricks you might have found!
You can read more on Popup Maker here, and be sure to check out the 26 essential plugins for any small business before you go!
Leave a Reply