
If you are an avid reader like me, you love words and discovering unique ways to use them (The sentence, “The rat the cat the dog chased killed ate the malt” is technically grammatically correct). However, not every post needs a small novella to properly explain every detail, and some things are not best portrayed through text. Sometimes you need to convey a lot of information as quickly as possible, and in such cases a picture can be your best friend to portray ideas, give information, or putting a reader in the right mindset.
Adding images to a WordPress site is a tool every online writer should have in their repertoire, so let’s take a few minutes to look through how anyone can quickly and easily add images to a WordPress site.
Step Zero: I GOTTA FIND A PLUGIN!?
No. Wait. Stop! You don’t need to install any plugins for this. Adding images is already one of the features native to WordPress. From the WordPress Administration screen click on the Post section and open one of the posts you would like to have an image.
Step One: Place Your Cursor Where You Would Like The Picture
WordPress uses your cursor’s location in the text to determine where the image should go.
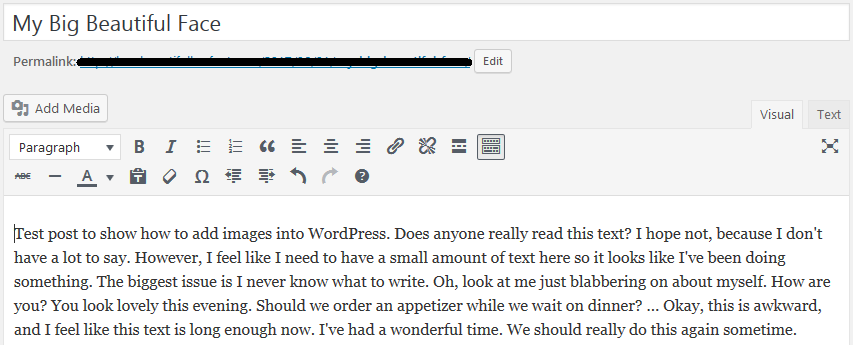
In the above image you can see my cursor is in the upper left corner beside the word “Test”. For formatting reasons this is most easily done by aligning your cursor with the left margin at the start or end of a paragraph, but feel free to play around with this until you can figure out what works best for your style.
Step Two: Choose Your Media
Once you’ve decided where you want your image to go, the next step is to click the Add Media button right above the formatting bar.

This will open an Insert Media popup in which you may choose to Upload Files from your computer, select a file you have already placed in you Media Library, Create a Gallery from images, choose a Featured Image, or use an image online by selecting Insert from URL. Let’s start from scratch and select Insert Media > Upload Files tab and click on the Select Files button. This will allow you to upload your files. They will be placed into your Media Library tab.

Step Three: Name and Describe Your Media.
In the Media Library tab you can select an the image (or images if you want more than one) and input what URL, Title, Caption, Alt Text, and Description you would like to have for your media on the right side of the window.

If you scroll down on the right side you can also alter the Attachment Display Setting. Change these if you like, but for the time being we are going to leave them alone. Once you are satisfied with your work, click on the Insert into Post button in the lower right hand corner of the window.
Step Four: Check Your Post
WordPress will now upload your image into your post where your cursor originally was! If you would like to tweak your photo or the placement of the image then you can hover your mouse over the image and click on the Pencil Tab to Edit the added media.

Once you are happy with your work you can continue to publish your post as normal, and that’s it! You’re Done!
Now that you know how to add images quickly and easily, you should check out how to add interactive images in WordPress, easily manage many images, and plugins to help keep your site from bogging down once you have a bunch added!
Thanks for reading! We hope this “How to” has helped you understand the ins and outs of adding images onto your wordpress site. If you have any helpful, personal tips on how to add images into your WordPress Site that we have not covered here please be sure to comment below and share!
Leave a Reply